
On this page
Which decades and film stocks yellow the worst?
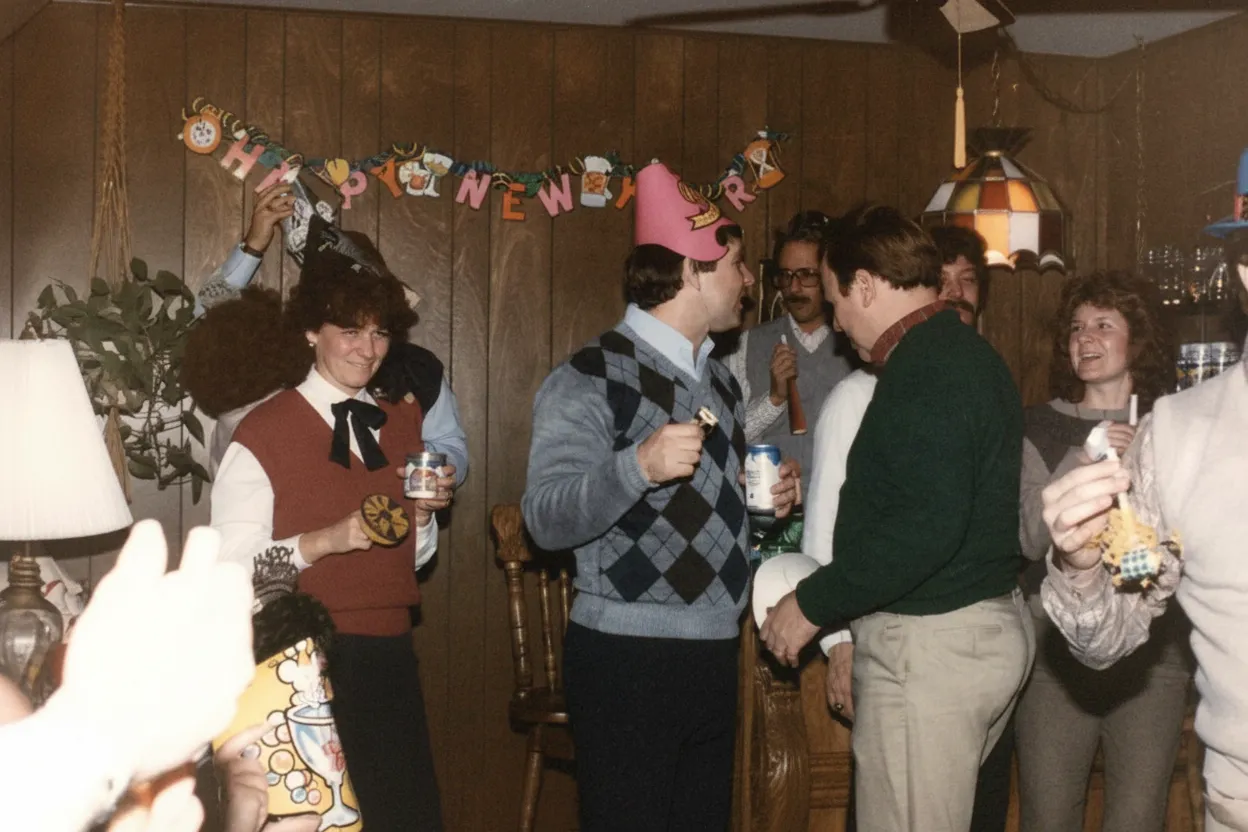
The worst yellowing happens in consumer prints from the 1970s and 1980s, when color photography was everywhere but the dye chemistry was not archival-grade. Kodak Ektacolor prints from 1-hour labs yellow heavily. Fuji Crystal Archive paper (used from the late 1990s onward) holds up much better. Agfacolor prints from the 1970s and 1980s are often the most yellowed of all because Agfa's cyan dye was particularly unstable. Professional lab prints on Cibachrome or Ilfochrome last much longer, but most family photos were not printed on professional paper. If your photos are from 1970-1995 and were printed at a drugstore or 1-hour lab, they are almost certainly yellow. The AI has seen millions of these and knows exactly how to reverse each manufacturer's specific color shift.
- 1970s-1980s drugstore prints: heaviest yellowing
- Agfacolor prints: often the worst due to unstable cyan dye
- Kodak Ektacolor from 1-hour labs: common and moderate yellowing
- Fuji Crystal Archive (late 1990s+): much better dye stability
- Professional Cibachrome/Ilfochrome: minimal yellowing even after decades
What to expect
The chemistry behind yellowing (and why your photos are not ruined)
Color prints use three dye layers: cyan, magenta, and yellow. The cyan dye is the least stable in consumer prints from Kodak, Fuji, and Agfa. It breaks down from the day the photo is processed. As cyan fades, the remaining magenta + yellow produce the characteristic orange-yellow cast.
This is universal. A print stored perfectly in a dark, cool closet will still yellow, just slower. By 30 years the shift is visible. By 50 years it is heavy. But this is a color imbalance, not data loss. The image is still there, hidden behind the wrong colors.
People confuse yellowing with sepia and fading. If your photo is from the 1970s-1990s and everything looks orange, that is yellowing. If your photo is from the 1920s and looks brown-toned, that is likely original sepia. If it just looks pale and flat, that is fading. If it looks very dark and muddy, see our fix dark photos guide. The AI identifies which type and applies the correct fix.
“My grandma cried when she saw her wedding photo restored. Absolutely incredible.”
Maria K.
“Uploaded a blurry photo from the 70s and got back a crystal clear image. Like magic.”
James T.
“Finally recovered old family photos I thought were lost forever. So easy to use.”
Sarah M.
How it works
3 simple steps.
The Science
Why your photos turned yellow (and why it is not your fault).
The cyan dye in color prints breaks down first. As it fades, the remaining magenta and yellow produce the orange-yellow cast. This affects all consumer prints from the 1960s-1990s. The image is intact underneath, just hidden behind the wrong colors.
- ✦Cyan dye fading is the primary cause in all consumer prints
- ✦Kodak, Fuji, Agfa: all yellow the same way
- ✦The underlying image data is intact, just color-shifted
Yellow vs Sepia vs Faded
Is your photo yellow, sepia, or just faded? It matters.
Yellowing is a color shift in 1960s-1990s prints. Sepia is an intentional warm tone in pre-1930s B&W photos. General fading is contrast loss without color shift. The AI identifies which type your photo has and applies the right correction automatically.
- ✦Yellowing: orange-yellow cast on 1960s-1990s color prints
- ✦Sepia: intentional warm brown tone on pre-1930s B&W prints
- ✦Fading: overall contrast loss without strong color shift
How Our App Fixes It
Upload the yellow photo. Get the real colors back in 30 seconds.
Upload your yellowed scan or phone photo and select "Restore Old Photo." The AI recalculates the original color balance in 30 seconds. Check skin tones, whites, and sky. If one photo from the 1980s is yellow, every photo from that era is too. Fix them all at once.
- ✦Works in any browser, phone or desktop
- ✦2 free restorations per account, no credit card needed
- ✦Full-resolution download, ready for printing
- ✦Family plan: 150 photos for $19.99
In-depth guide
How to fix yellow photos: step by step
The single most important thing: do not let your scanner or phone auto-correct the color before you upload. Scanners have a built-in auto-color feature that tries to remove the yellow cast. It does a crude job and the result conflicts with the AI's much more accurate correction. Turn off auto-color, auto-enhance, and auto-levels. Scan the raw yellow photo as-is. On most scanner software, look for "No corrections" or "Manual" mode.
If using a phone camera, shoot in natural daylight near a window. This matters more for yellow photos than any other type because indoor ceiling lights are warm-toned (yellow) and make the photo look even more yellow in the capture. The AI needs to see the actual yellowing, not yellowing plus warm light. A cloudy day or a north-facing window gives the most neutral light.
Upload to restorephotosapp.com and select "Restore Old Photo." The AI strips the yellow cast in about 30 seconds. After processing, check the three reference points: skin tones, whites, and sky. Zoom in on faces. The yellow cast often hides subtle skin detail like freckles, lip color, and eye color that becomes visible again after correction.
For a shoebox full of yellowed photos from the same era, they all have roughly the same color shift because they were printed on the same paper at the same lab. The AI fixes each one individually, but the consistency means you can work through them quickly. A typical box of 50-100 photos takes about an hour to scan and process.
Common mistake: people scan a yellowed photo, open it in their phone's photo editor, drag the color temperature slider toward blue to "cancel out" the yellow, and then upload that. The result looks worse because the AI is now trying to correct an artificial blue shift on top of a yellow-corrected image. Just upload the raw yellow scan. Trust the AI.
Expert tips
Tips for fixing yellow photos
Check if it is yellowing or intentional sepia
Photos from before 1930 are often sepia-toned by design. If you "fix" the yellow, you remove the original artistic tone. The AI handles this correctly in most cases, but if your old B&W photo looks brown-warm by design, use "Restore" which preserves the tone rather than stripping it.
Disable your scanner's auto-color correction
Every scanner tries to auto-fix yellowing. Its algorithm is crude and conflicts with the AI. Scan in manual mode with all corrections disabled for the best results.
Shoot in daylight, never under indoor lights
Ceiling lights add warm yellow tones to the capture, making the yellowing look worse and giving the AI a misleading input. Natural daylight gives the truest color reading.
Do all photos from the same era at once
If one photo from 1985 is yellow, every photo from that year and lab is yellow. Batch them together and process in one session with the Family plan.
Pricing
One-time pricing. No subscription. Credits never expire.
One-time payment
Starter
$0.50 / credit
= restore 10 photos
Perfect for trying it out on a few precious photos.
- High-Resolution Output
- Credits Never Expire
- Free Digital Frames
- 30-Day Money-Back Guarantee
100% Money-Back Guarantee
One-time payment
Pro
$0.50 / credit
= restore 30 photos
For restoring a small album of memories.
- High-Resolution 1080P Output
- Credits Never Expire
- Free Digital Frames
- 30-Day Money-Back Guarantee
100% Money-Back Guarantee
One-time payment
Family
$0.13 / credit
= restore 150 photos
Save 74% per credit
Restore your entire family photo collection.
- High-Resolution 1080P Output
- Credits Never Expire
- Free Digital Frames
- 30-Day Money-Back Guarantee
100% Money-Back Guarantee
One-time payment
Studio
$0.11 / credit
= restore 450 photos
Save 78% per credit
For entire archives, professionals, and power users.
- High-Resolution 1080P Output
- Credits Never Expire
- Free Digital Frames
- Priority Support
- 30-Day Money-Back Guarantee
100% Money-Back Guarantee
Prices don't include VAT.
FAQ
Frequently asked questions
Why did my photo turn yellow?
The cyan dye layer in color prints breaks down faster than the magenta and yellow layers. The remaining magenta + yellow = orange-yellow cast. This affects virtually all consumer color prints from the 1960s through 1990s. If your photo is also faded (washed out, not just yellow), see restorephotosapp.com/fix-faded-photos.
Is my yellow photo ruined?
No. Yellowing is a color shift, not data loss. The image is intact underneath the wrong colors. AI recalculates the original color balance and strips the yellow cast. The result usually looks like a well-preserved original.
Is the yellow color on the surface? Can I wipe it off?
No. The yellowing is inside the print, in the dye layers themselves. It is not a surface coating. No cleaning product, cloth, or chemical can remove it physically. The only fix is digital color correction.
Can I use a phone app to remove the yellow tint?
Phone apps apply uniform color shifts (dragging a slider toward blue). This partially cancels the yellow but overcorrects some areas and undercorrects others. AI correction is different: it analyzes each part of the image individually and applies the right correction to skin, clothing, sky, and backgrounds separately.
My scanner makes the yellow look even worse. What am I doing wrong?
Your scanner is probably adding its own auto-color correction on top of the yellowing, making it look patchy or overprocessed. Disable all auto-enhance, auto-color, and auto-levels features in your scanner software. Scan the raw yellow photo and let the AI handle the correction.
Which photos yellow the most?
1970s-1980s drugstore and 1-hour lab prints yellow the heaviest, especially those from Agfa and older Kodak Ektacolor paper. Professional prints on Cibachrome and Fuji Crystal Archive resist yellowing much better.
Is it free to try?
Yes. Every account gets 2 free restorations. Upload your most yellowed photo and see the original colors come back before spending anything.
Will removing yellow also fix the blurriness?
If the photo appears blurry because the yellow cast is hiding contrast and detail, yes, the correction will reveal sharper detail. If the original photo was out of focus, try restorephotosapp.com/fix-blurry-photos after color correction for the best result.


