On this page
Why old photos look bad (and how AI fixes it)
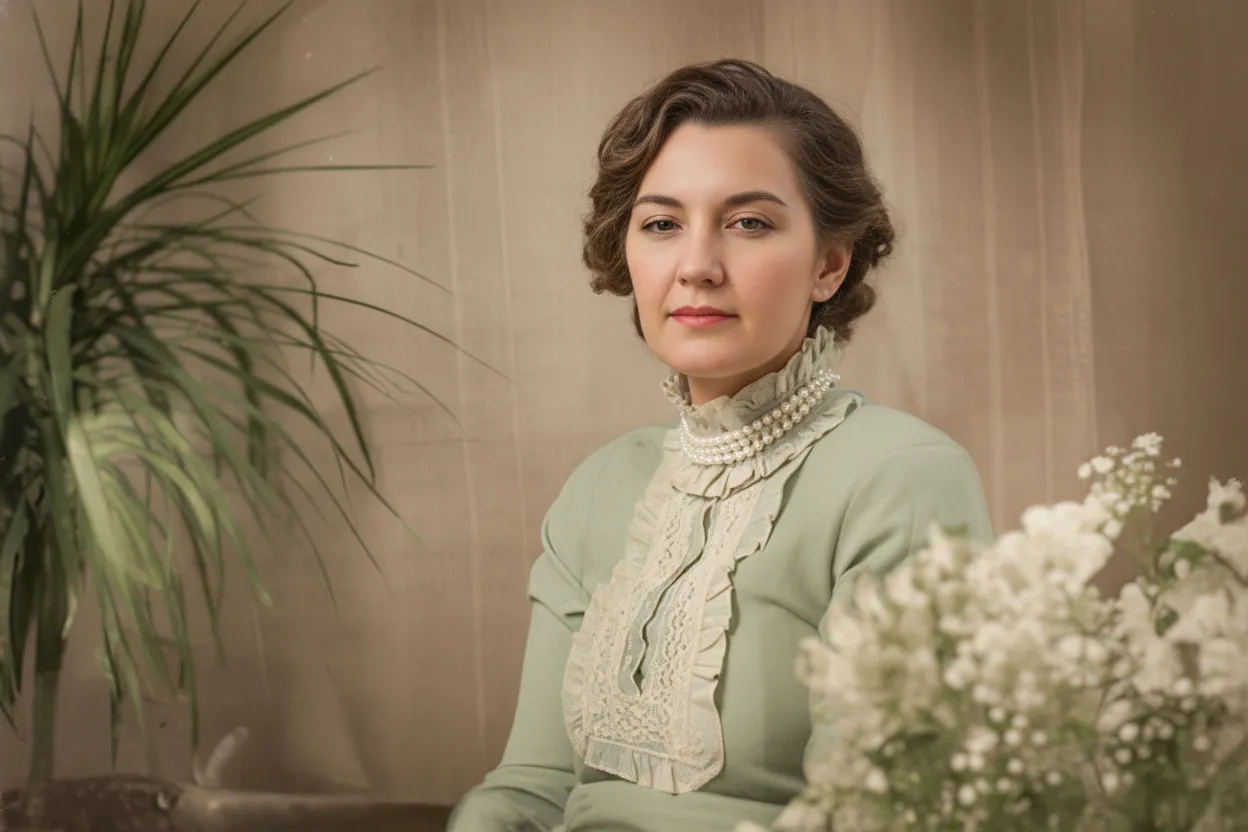
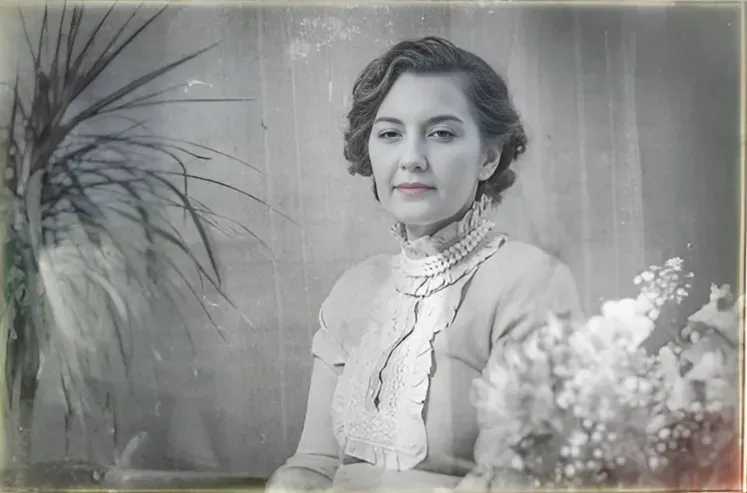
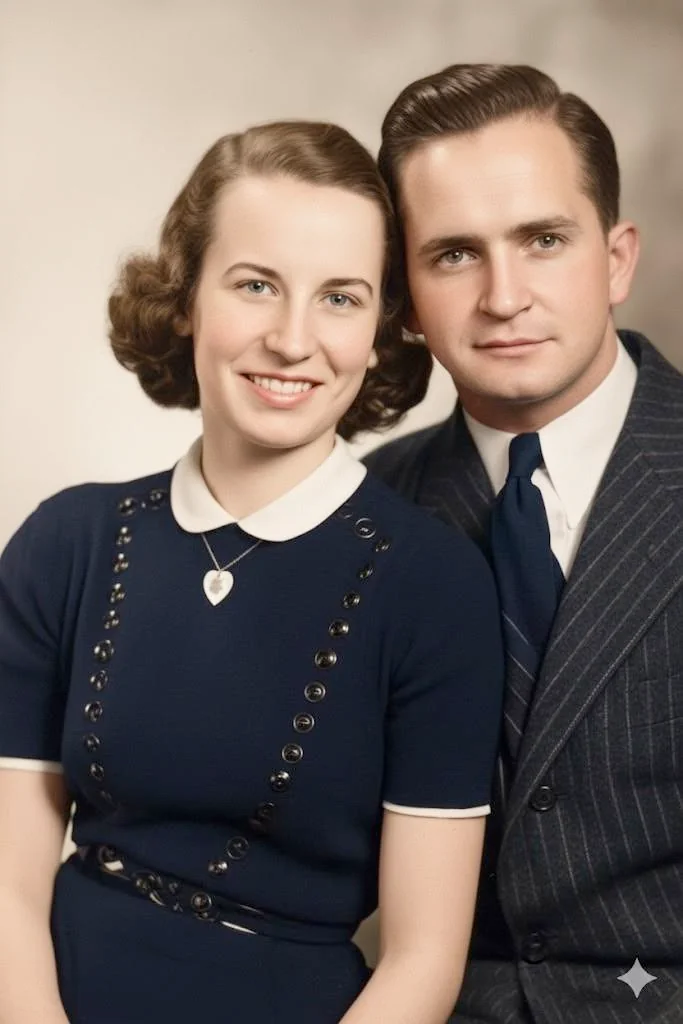
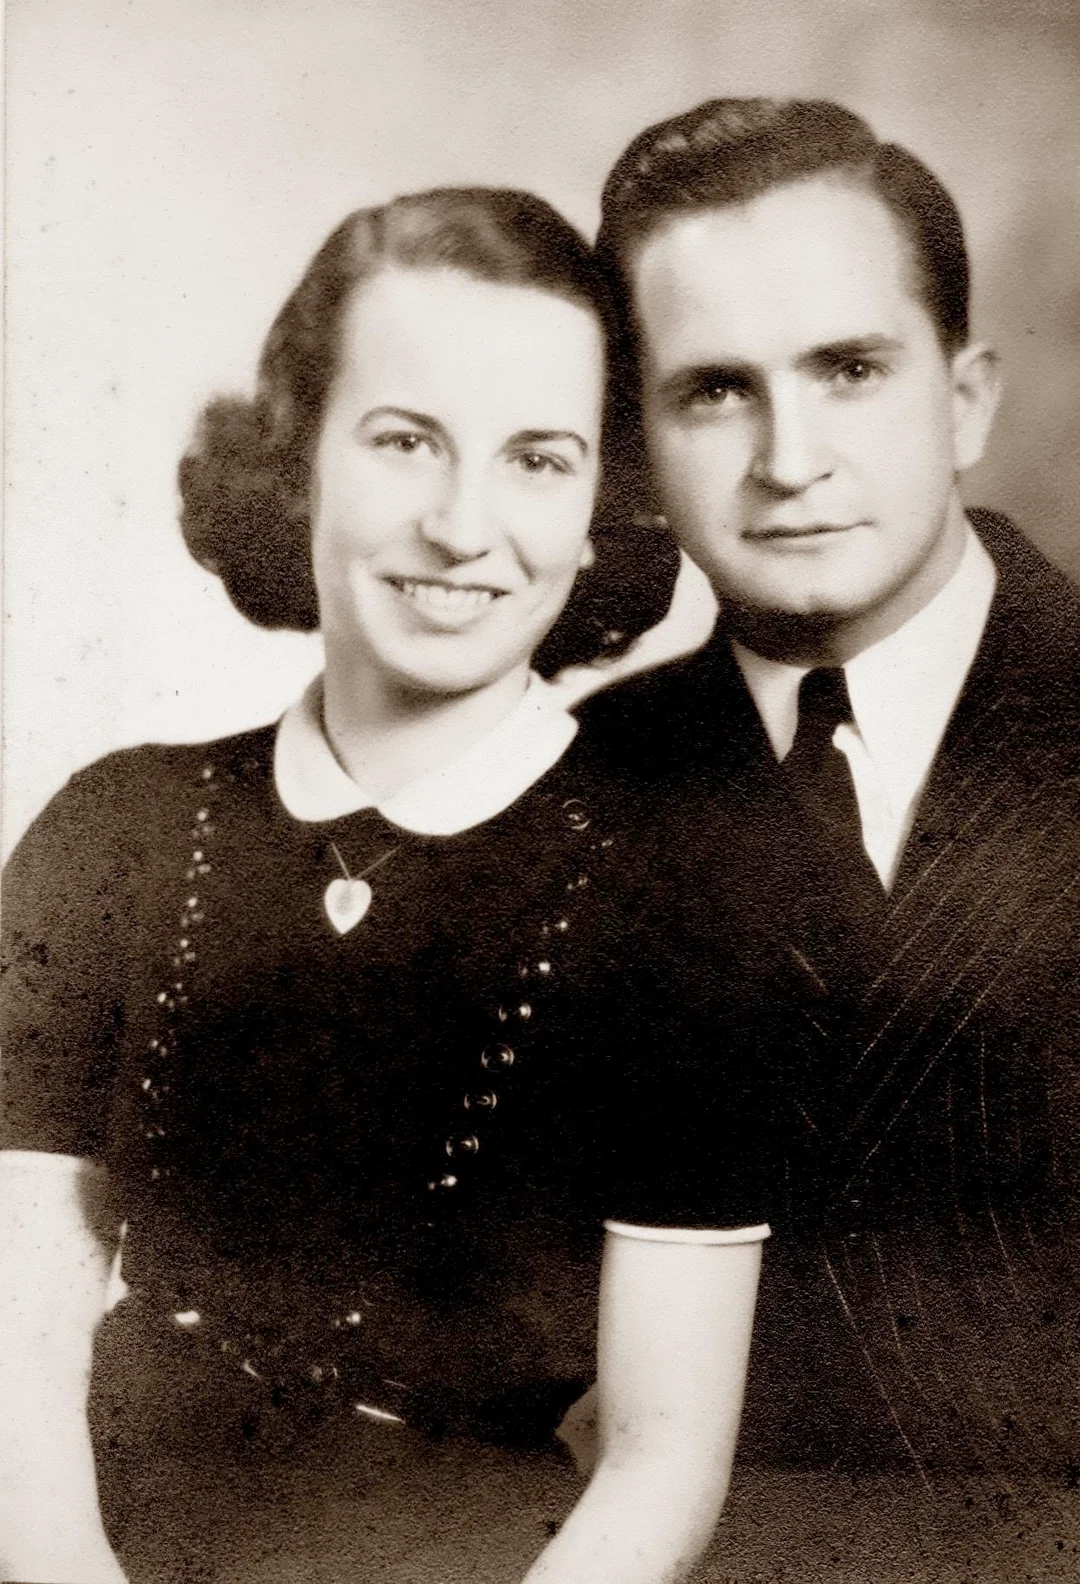
An old photo looks dull for specific, reversible reasons. Paper-based prints fade because the dyes and silver compounds degrade with exposure to light, heat, and humidity. Color photos shift toward yellow or magenta as certain dye layers decay faster than others. Scans from the 1990s and 2000s were done on cheap flatbed scanners at low resolution, so the digital copy is soft and grainy even though the original print looked fine. Early digital cameras (1 to 3 megapixels) produced photos that are tiny by modern standards. AI enhancement reverses all of these problems because it has learned what a high-quality photo looks like and can reconstruct sharpness, color, and detail that were lost to time, chemistry, and bad hardware.
- Reverse decades of fading, yellowing, and color shift
- Sharpen faces and details softened by low-res scanners
- Brighten dim indoor photos taken with no flash
- Make old photos sharp enough to print at 8x10 and larger
- Enhance a whole album for $0.13 per photo on the Family plan
What to expect
Enhancement vs restoration vs sharpening: which one do you need?
Enhancement is for photos that are not damaged, just degraded. If your photo has no scratches, tears, or water stains but looks soft, dull, faded, or dim, enhancement is the right mode. It improves overall quality: sharper faces, brighter exposure, more vivid colors, less grain.
Restoration is for photos with physical damage: scratches, creases, tears, water stains, mold spots, tape marks. If your photo has visible surface damage on top of fading, start with "Restore Old Photo" mode, which fixes both the damage and the degradation in one pass.
Sharpening is specifically for blur. If your photo is out-of-focus, has motion blur from camera shake, or the subject moved during the exposure, "Sharpen" mode is designed for that. It reconstructs lost detail from blur rather than just boosting contrast.
Not sure? Start with Enhancement. If the result does not fix the specific problem you see, try Restore or Sharpen. Your first 2 uses are free, so you can experiment without spending anything.
“My grandma cried when she saw her wedding photo restored. Absolutely incredible.”
Maria K.
“Uploaded a blurry photo from the 70s and got back a crystal clear image. Like magic.”
James T.
“Finally recovered old family photos I thought were lost forever. So easy to use.”
Sarah M.
How it works
3 simple steps.
AI Enhancement
Sharpens, brightens, and restores color in one pass.
Old photos look bad for specific, fixable reasons: faded pigments, low scan resolution, dim indoor lighting, and chemical color shifts in the paper. Traditional editing means dragging sliders for sharpness, brightness, contrast, saturation, and noise one at a time, without knowing what values are right. Our AI was trained on millions of photo pairs (degraded and high-quality), so it knows exactly how to reverse each type of degradation in a single automatic pass. Faces get sharper. Colors return to natural. Dark areas gain detail. And the photo still looks like your photo, not an over-processed version.
- ✦Sharpens soft faces, eyes, hair, and skin texture
- ✦Corrects faded, yellowed, and shifted colors back to natural
- ✦Brightens dark exposures and recovers shadow detail
- ✦Reduces grain and noise from old film or low-light phone shots
Easy to Use
No sliders. No Photoshop. No guesswork.
Every photo editor asks you to guess at the right brightness, contrast, and sharpness values. Most people make photos look worse by overdoing it. Our AI skips all of that. Drop your old photo on the page, pick "Enhance," and the model figures out exactly what needs to change. You see a before-and-after slider in about 30 seconds. If you like the result, download in full resolution. No layers, no presets, no manual adjustments.
- ✦Works in any browser on desktop, iPhone, or Android
- ✦Phone snapshots of old prints work as well as scans
- ✦Full-resolution enhanced photo ready in under 30 seconds
- ✦No editing skill or software required
For Families & Projects
Make old photos good enough to print, frame, and share.
A faded family portrait from the 1970s, a dim scan of a baby photo, a tiny thumbnail someone emailed you 15 years ago. These photos are technically fine but they look bad. Colors are washed out, faces are soft, and the whole image feels flat. Enhancement is for photos that are not damaged, just degraded by time and poor digitization. After enhancement, they are sharp, vibrant, and ready to print at any size, frame for a wall, or share in a family group chat.
- ✦Perfect for inherited albums, old scans, and faded prints
- ✦2 free enhancements on signup, no credit card
- ✦One-time pricing, no subscription, credits never expire
- ✦30-day money-back guarantee on every credit pack
In-depth guide
How to enhance old photos: step by step
Start by identifying what makes the photo look bad. Is it faded and washed out? Is the exposure dark and muddy? Are faces soft and lacking detail? Is the whole image tiny (under 1000 pixels wide)? Is there a yellow or magenta color cast? Any combination of these is what enhancement is designed to fix. If the photo has physical damage (scratches, tears, stains), use "Restore Old Photo" mode instead.
Digitize the print if you have not already. A flatbed scanner at 600 DPI in color mode gives the AI the most data to work with. If the original print is in decent shape, 300 DPI is fine for enhancement since the AI is adding quality, not trying to distinguish damage from image content. No scanner? A phone photo in bright daylight works. Lay the print flat, hold the phone directly above it, and avoid ceiling lights (they add a yellow cast and create glare).
Upload to restorephotosapp.com/restore and select "Enhance" mode. The AI processes the photo in about 30 seconds. You see a before-and-after slider where you can drag across the image to compare. Zoom in on faces to see the difference in eye detail, skin texture, and hair. The improvement is usually dramatic on faded prints from the 1960s through 1990s.
For low-resolution scans or early digital camera photos, enhancement also improves perceived resolution. The AI adds realistic detail that the original capture missed, so a soft 2-megapixel photo from 2003 looks significantly sharper and more detailed after enhancement. It will not turn a thumbnail into a poster, but it makes low-res photos look natural at larger display sizes.
For very faded photos with heavy color casts (deep yellow, orange, or magenta), the color correction in one pass is usually enough. If the color is still slightly off after enhancement, try running "Restore Old Photo" mode on the enhanced result. The combination of both modes can produce stunning color recovery on prints that looked hopelessly faded.
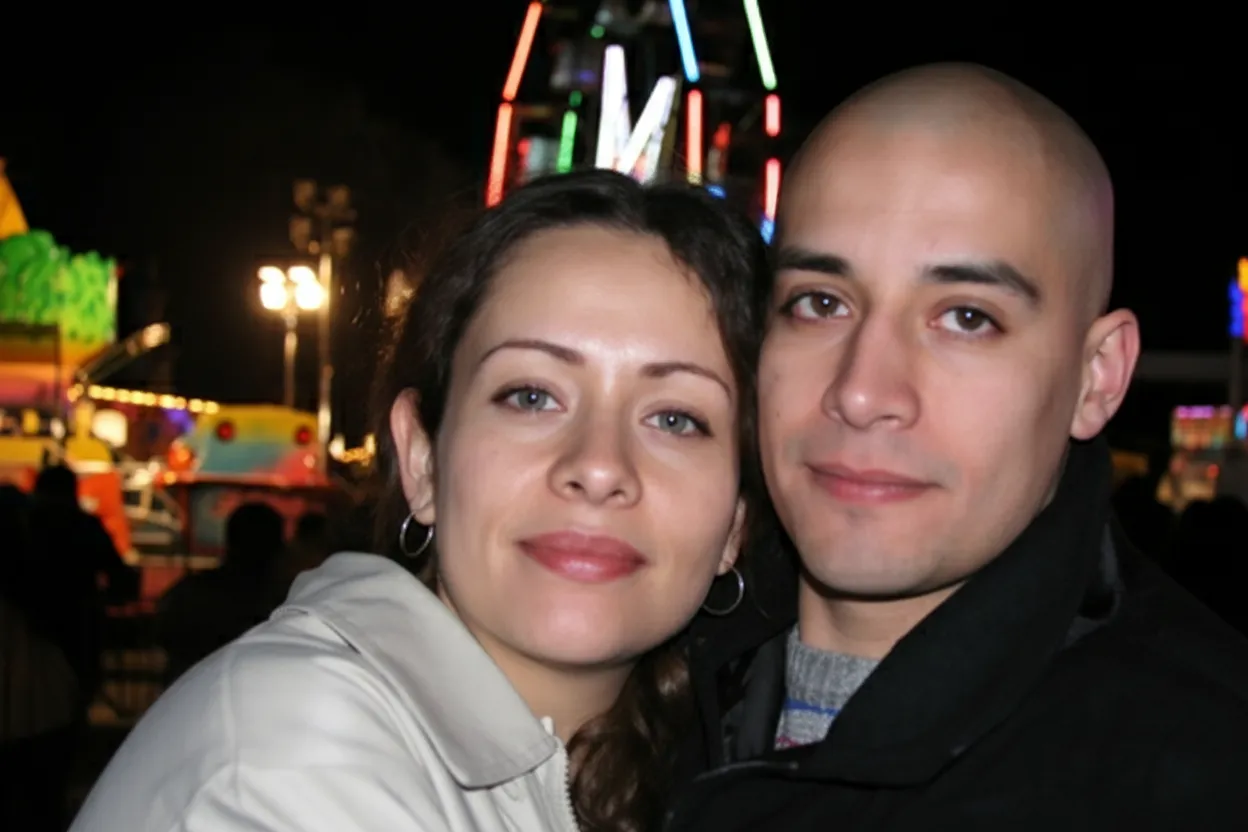
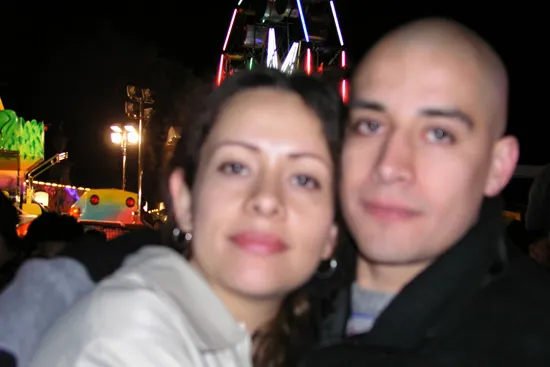
Dark indoor photos from the 1970s and 1980s (family dinners, holiday gatherings, parties) are a common use case. These photos were often shot with slow film, no flash, and incandescent lighting, leaving them dark, grainy, and orange. Enhancement brightens the exposure, reduces the grain, and corrects the orange color cast, often revealing faces and details that were nearly invisible in the original.
Once enhanced, save two copies: one to cloud storage (iCloud, Google Photos, Dropbox) and one to a local drive. If you plan to print the enhanced photo for framing, use a real photo lab on archival paper. A faded 1970s family portrait that was too dim and soft to frame can often become a beautiful 8x10 print after AI enhancement.
Bonus: after enhancing a black-and-white or sepia photo, try running the enhanced version through "Colorize B&W" mode to see it in full color. Enhancement gives the colorizer a much sharper, cleaner input, so the colors come out more vivid and accurate. An enhanced-then-colorized portrait of a grandparent is one of the most popular gifts on our platform.
Expert tips
Tips for the best enhancement results
Enhancement is for quality, not damage
If your photo has scratches, tears, or water stains, use "Restore Old Photo" instead. Enhancement is for photos that are intact but look faded, soft, dim, or washed out.
Start with your dullest, most faded photo
Your 2 free credits are best spent on the photo with the worst color and contrast. Faded 1970s prints with dim indoor lighting show the most dramatic improvement.
Scan at 600 DPI for the sharpest result
The more data the AI starts with, the better the result. A 600 DPI scan gives the AI plenty of detail to sharpen. For photos that are already digital (old emails, early digital camera JPEGs), upload the highest resolution version you have.
Use window light for phone captures
If you are photographing the print with your phone, bright daylight from a window gives the cleanest, most color-neutral capture. Ceiling lights add yellow, and flash creates harsh glare.
Try different modes if the first does not fix your specific issue
Enhancement improves overall quality. If the result is sharper but the photo is still blurry from camera shake, try "Sharpen" mode. If there is physical damage, try "Restore Old Photo." Your first 2 uses are free across all modes.
For heavy color casts, run two passes
Deep yellow or magenta casts from chemical fading sometimes need two passes. Enhance once to fix the worst of the color shift, then run "Restore Old Photo" on the result for the remainder.
Enhance first, then colorize
For black-and-white or sepia photos, always enhance before colorizing. A clean, sharp input gives the colorizer much better data, and the resulting colors are more vivid and accurate.
Do not over-edit before uploading
If you already cranked up the brightness and saturation in another editor, the AI has less room to work with. Upload the original, unedited file and let the AI handle everything in one pass.
Pricing
One-time pricing. No subscription. Credits never expire.
One-time payment
Starter
$0.50 / credit
Perfect for trying it out on a few precious photos.
- 10 Credits Included
- Restore 10 Photos
- High-Resolution Output
- Credits Never Expire
- Free Digital Frames
- 30-Day Money-Back Guarantee
100% Money-Back Guarantee
One-time payment
Pro
$0.50 / credit
For restoring a small album of memories.
- 30 Credits Included
- Restore 30 Photos
- High-Resolution 1080P Output
- Credits Never Expire
- Free Digital Frames
- 30-Day Money-Back Guarantee
100% Money-Back Guarantee
One-time payment
Family
$0.13 / credit
Save 74% per credit
Restore your entire family photo collection.
- 150 Credits Included
- Restore 150 Photos
- High-Resolution 1080P Output
- Credits Never Expire
- Free Digital Frames
- 30-Day Money-Back Guarantee
100% Money-Back Guarantee
One-time payment
Studio
$0.11 / credit
Save 78% per credit
For entire archives, professionals, and power users.
- 450 Credits Included
- Restore 450 Photos
- High-Resolution 1080P Output
- Credits Never Expire
- Free Digital Frames
- Priority Support
- 30-Day Money-Back Guarantee
100% Money-Back Guarantee
Prices don't include VAT.
FAQ
Frequently asked questions
What does "enhance" actually do to my photo?
It sharpens soft faces and details, corrects faded or shifted colors back to natural, brightens dark exposures, reduces film grain and digital noise, and improves perceived resolution. All of this happens in one automatic pass. The photo still looks like your photo, just significantly better quality.
My old family photo looks faded and dull. Will this fix it?
Yes, this is the most common use case. Faded prints from the 1960s through 1990s show the most dramatic improvement. Colors come back to life, faces get sharper, and the flat, washed-out look disappears. Try your 2 free enhancements on your most faded photo first.
How is enhancement different from restoration?
Enhancement improves quality (sharpness, color, brightness, grain) on photos that are not physically damaged. Restoration repairs actual damage (scratches, tears, water stains, creases). If your photo has both fading and damage, start with "Restore Old Photo" mode, which handles both at once.
Can it fix a really dark indoor photo?
Yes. Dark photos from indoor events (family dinners, holiday parties, birthday celebrations) shot with slow film and no flash are a common use case. The AI brightens the exposure and corrects the orange color cast from incandescent lighting, often revealing faces that were barely visible in the original.
Can it improve a low-resolution scan or early digital camera photo?
Yes. Low-res scans from 90s-era flatbed scanners and early digital photos (1 to 3 megapixels) are soft and grainy by modern standards. The AI adds realistic detail, so the enhanced photo looks natural at larger display and print sizes. It will not turn a 100-pixel thumbnail into a poster, but it significantly improves anything above about 500 pixels wide.
Will it make my photo look over-processed or fake?
No. The AI is trained to produce natural-looking results, not the overcooked, hyper-saturated look of cheap phone filters. Skin tones stay realistic, colors are vivid but not cartoonish, and sharpening does not create halos or artifacts. The goal is "how this photo should have looked," not "how this photo looks with 10 Instagram filters stacked on top."
Is there a free way to try it?
Yes. Every new account comes with 2 free enhancements. No credit card required. Use them on your dullest, most faded photo so you can see the maximum improvement before buying anything.
How much does it cost?
First 2 free. After that: $4.99 for 10 ($0.50 each), $14.99 for 30, $19.99 for 150 ($0.13 each), or $49.99 for 450 ($0.11 each). For a family album of 50 to 150 photos, the Family plan at $19.99 is the right fit. Credits never expire and every plan has a 30-day money-back guarantee.
Do I need Photoshop or Lightroom?
No. No editing software, no sliders, no presets, no curves. The AI runs in your browser and handles everything automatically. Upload, wait 30 seconds, download.
Can I do it on my phone?
Yes. Open restorephotosapp.com in any mobile browser. Take a photo of your old print in bright daylight (or upload a scan from your camera roll), pick "Enhance," and save the result back to your phone. No app to install.
How long does it take?
Under 30 seconds per photo. Upload your scan or phone snapshot, and the AI delivers the enhanced version almost instantly. For a batch, upload multiple photos at once and download the results as a ZIP.
Can I enhance photos from the 1960s or 1970s?
Yes, and photos from these decades show some of the most dramatic improvements. 1960s prints are often faded to near-sepia, and 1970s color photos are frequently dim, orange-tinted, and soft. Enhancement reverses all of these degradation patterns.
Can I fix a photo that someone texted me or emailed years ago?
Yes. Photos shared through text messages, email, or early social media (pre-2010 Facebook, MySpace) were often compressed to tiny sizes. Enhancement improves the sharpness and color, though very small images (under 300 pixels wide) may not have enough data for a full recovery. Upload the largest version you can find.
Can I enhance a whole album at once?
Yes. Upload multiple photos and the AI processes each individually. Download everything as a ZIP. For big batches, the Family plan ($0.13 per photo) or Studio plan ($0.11 per photo) keeps it affordable.
Will the enhanced photo be good enough to print?
Yes. Output is full resolution. Pro, Family, and Studio plans include 1080P output, which prints well at 8x10 and larger. A faded family portrait that looked too dull to frame can become a sharp, vibrant print after enhancement.
Can I colorize a black-and-white photo after enhancing it?
Yes, and the results are better when you enhance first. Run "Enhance" to sharpen and clean up the image, then "Colorize B&W" on the enhanced result. A sharp input gives the colorizer better data, and the colors come out more vivid and natural.
What happens to my photo after I upload it?
Photos are transferred securely over HTTPS and stored privately on Cloudflare R2. Originals and enhanced versions stay for 30 days so you can re-download, then they are automatically and permanently deleted. We never share your photos and never use them to train AI models.
Can I animate an enhanced photo?
Yes. After enhancing a portrait, try our Animate feature. It turns the photo into a short video where the person blinks, smiles gently, or the camera slowly pushes in. Each animation costs 3 credits. An enhanced-then-animated portrait of a grandparent makes a memorable gift.


